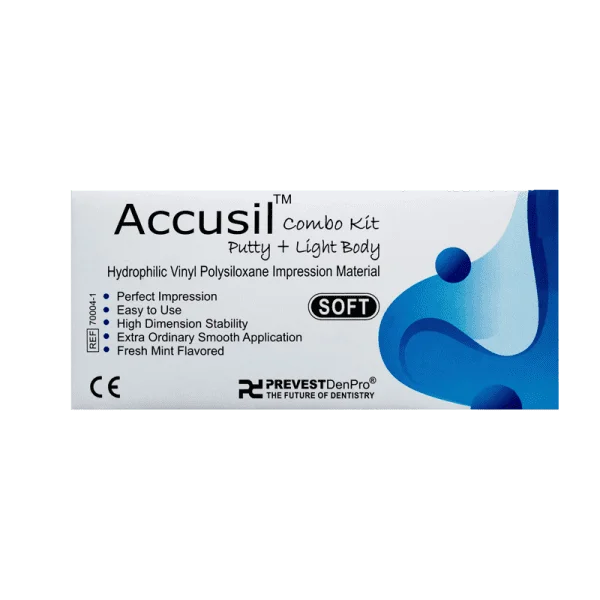
Instructions for use :
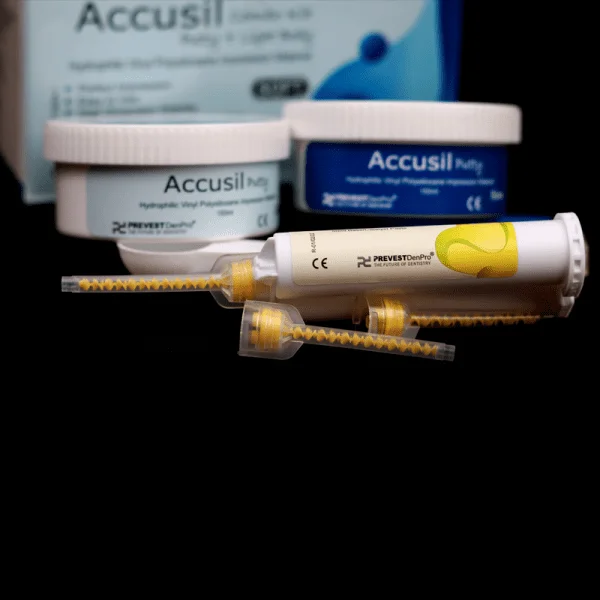
Pull off the cartridge plug and discard it. Eject a small amount of material directly out of the cartridge onto a paper towel/tissue held in your hand. Extrude enough material until it is evident that base and catalyst are being ejected. This ensures proper mixing. Immediately wipe the cartridge orifice to remove excess material. Attach the mixing tip to the cartridge by aligning the prongs inside the tip with the cartridge orifice. Seat the tip onto the cartridge and twist a ¼ turn clock-wise (90°) to lock it in place. Push the Oral tip if needed firmly onto the end of the mixing tip. Squeeze the trigger with a smooth, steady force to mix and dispense material. Avoid abrupt movements. Release the trigger to stop the flow.
Tray Selection :
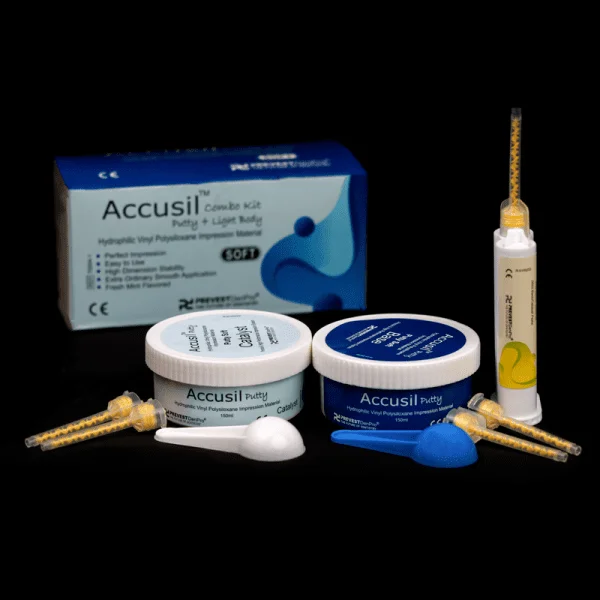
- Accusil Putty may be used with a suitable metal tray, a firm disposable tray, or a custom tray. For maximum accuracy use rigid trays offering good retention. Use of tray adhesive is recommended.
Dispensing :
- Allow Accusil Putty material to reach room temperature prior to use.
- Using the scoops provided, dispense equal quantities of base and catalyst.
Note: Close jars immediately after use. Do not interchange base and catalyst screw caps or scoops.
Mixing :
- Knead by hand until a uniform color is achieved. Note: Latex gloves should be removed and hands washed thoroughly before mixing.
- To obtain optimum physical properties, the mix should be completely homogenous (streak-free), usually in about 45 seconds.
Impression :
Insert the tray and press it into position (2–3 sec). Hold it without pressure until material is set. Double arch impression technique: after the introduction of the tray, central occlusion must be achieved and maintained until the material has completely set. Material residue needs considerably more time to set at room temperature. Check intraorally if the material is set before removing from the mouth. High temperatures accelerate and low temperatures slow down setting.
Fabrication of models :
The stone models may be poured after 30 min at the earliest. The impression remains dimensionally stable for a practically unlimited period of time (at least 7 days). The surface tension will be reduced and pouring will be facilitated if the impression is briefly washed out with a detergent and rinsed thoroughly in clear water afterwards.
Impression Procedure Two Phase/One Step
Procedure(Putty wash technique)
- If there is any debris or blood, clean field with air water spray.
- Remove excess water with suction. Do not dessicate the tooth.
- Mix Accusil Light Body, (Regular Set), backfill the impression syringe or attach an intra oral tip to the end of the mix tip for direct intraoral syringing.
- Inject syringe mix into and around tooth preparations. It is suggested to syringe completely around the margins of the preparation, making sure to keep syringe tip within impression material. Do not blast with air. Accusil Light Body Impression Material’s hydrophilic properties improve adaptation to the tooth enabling better “wetting”.
- While syringing wash material, the assistant should mix the putty load the tray.
- Place Accusil Putty material directly into impression tray and dimple impression. (This technique ensures the least amount of air incorporation.) Seat tray. Retain impression in position until firmly set. (Note: The material sets faster in the mouth.) Check impression in the mouth not on the bench. Note: Latex gloves should be removed and hands washed thoroughly before checking. Be sure it is firm, resilient, and non-tacky before removal. The minimum removal time (tested according to A.D.A. Specification #19) is 5 minutes from start of mix.
- Remove impression by pulling slowly to break seal, then snap out along the long axis of the tooth. Rinse impression under cold water and blow dry. Do not store impression in direct sunlight. If the impression is to be shipped, use suitable packaging to preclude distortion.
Technique Tip: Some residual moisture prior to syringing is acceptable.
Two Phase/Two Step Procedure
- If there is any debris or blood, clean field with air water spray.
- Remove excess water with suction. Do not dessicate tooth.
- Place a polyethylene spacer sheet over putty and seat tray slowly. (Note : if a polyethylene sheet is not used, relieve the entire impression to provide at least 2 mm of space for the Accusil Light Body, (Regular Set) material.)
- Allow impression to remain undisturbed until it has set firmly (five minutes from start of mix).
- Remove impression when it reaches a rubbery consistency.
- Remove polyethylene sheet from impression surface. The impression should be washed free of saliva and thoroughly air dried before use as a base for subsequent impressions.
- Select either Accusil Light Body, (Regular Set) as a wash material and mix.
- Syringe Accusil Light Body, (Regular Set) material evenly around prepared teeth and directly onto Accusil Putty impression. Replace in mouth and allow to set for 2 minutes 30 seconds to 3 minutes in the mouth (not including work time).
- Remove impression with a direct pull.
- Store impression at room temperature. Pour impression with stone or other die materials within 14 days.
Directions for Border Molding :
- Apply Tray Adhesive to the borders of the tray.
- Dispense equal amounts of base and catalyst onto a mixing pad and knead by hand until a uniform color is obtained – mixing time: 45 seconds. Note : Latex gloves should be removed and hands washed thoroughly.
- Roll the mix into a thin rope and apply uniformly to the tray borders.
- Instruct patient to perform the various f u n c t i o n a l m o v e m e n t s n e c e s s a r y f o r conventional border molding techniques.
- Five minutes from start of mix, remove tray and examine borders. The addition of a small mix can be used if voids or deficient areas are present. Over-extensions can be easily removed with a scalpel blade.
- The final impression can be made with Accusil Light Body, (Regular Set).
Contraindications :
The use of Accusil Light Body is contraindicated if the patient in known to be allergic to any of its ingredients.
Storage :
Keep away from direct heat and moisture. Keep in a cool place
Shelf Life : 3 years from the date of manufacturing.


Simran –
After trying out the Accusil Combo Kit, I can confidently say it’s one of the best impression materials I’ve used. The set time is just perfect—not too fast, allowing me to work at my own pace. The accuracy of the impressions has improved noticeably, which is vital for my restorative work. Considering the performance and ease of use, I believe this kit offers excellent value for any dental professional looking to enhance their impression-taking process.
Arun –
I recently used the Accusil Combo Kit for a series of dental impressions, and I was really impressed by the quality. The hydrophilic vinyl polysiloxane putty has a fantastic consistency that makes it easy to work with, and it sets quickly while still allowing for precision. The light body material captures intricate details beautifully. Overall, this kit provides an excellent balance of workability and accuracy
Jigar –
The Accusil Combo Kit is a game-changer in my dental toolkit. The ease of mixing and applying the putty and light body materials makes the impression-taking process smooth and stress-free. I particularly appreciate how the hydrophilic properties help in achieving great results even in moist conditions. I’ve experienced fewer retakes with this kit, making it a reliable choice for efficient workflows.